Deb and I used to own a storefront. We sold lots of home decor, repurposed, and painted furniture. We had LOTS of practice chalk painting furniture and making homemade pieces. I think everyone has their own technique and Deb came up with a really cool way of painting furniture to make new wood look old. So whether it’s a custom piece that you made yourself, or a thrift store fine. you can achieve the look. I took photos and step by step instructions from Deb when she was finishing little piece I found at the thrift store last week. It wasn’t BAD… I am just not a color person. And, I wanted this little piece to look old and be unique. So here is a quick technique to make new wood look old.

Quick Technique to Make New Wood Look Old
I thought this piece would be so cute to store my office supplies in. I’ve never shown you my office because quite frankly, it’s not organized. Well, Deb’s side of the table is, but mine is a train wreck. Like I said above, I found this little cubby drawer as I was strolling through the thrift store recently. It was actually covered in wallpaper. Deb sanded it all off for me, so we were left with raw wood.

If the wood would have been pretty, I would have left it raw. But there were too many variations in color for me. I already have a little antique piece just like this and it is stained wood… so I thought this would be the perfect piece to show her technique. I use some of the same techniques but not quite like she does, and if you are interested, I wrote about it a few years ago. Here is how Deb makes new wood look old.
Step One
Beat the crap out of the piece with a hammer. We did this to our floors at the old house and will be using this same technique when we build our new house, too. By distressing them before you stain them, it makes them look like they have always been there.

Step Two
Stain the entire piece and wipe with a paper towel. We do this in sections. Stain an area and wipe. We used Minwax Dark Walnut but you can use anything. We like the darker color because it shows through under the paint.

Step Three
Paint your piece while the stain is still tacky. Deb literally does this immediately after she stains. She used a white paint we already had on hand.


Step Four
When the paint is still tacky, add another coat of paint. It creates an aged look… almost like the underneath coat is dragging through creating a layer of paint.


Step Five
Rub the edges with paper towel. Deb uses the same paper towels that she removed the stain with, and rubs the edges. It creates another layer of age-i-ness.

Step Six
Sand. Sand the edges with sandpaper while the paint is still very tacky. (not completely wet and not dry) It takes some of the sheen off of the paint AND creates a very distressed look.


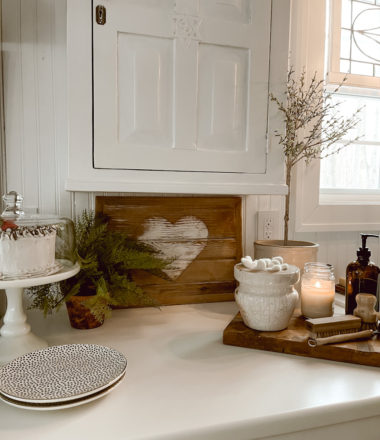
Here is the end result!
I ended up removing the glass knobs because I wanted it to look like a little file cabinets type of thing. The handles are something I already had on hand but you can get them new. I just printed off numbers on my computer and slipped the paper down in the handles.


Do you like my new little office organizer cubby thingy? I will never be as organized as Deb but something like this will at least LOOK cute. And I LOVE her technique.


Ellen Cousar says
WOW! You had a good eye for this piece. I would have walked by. Beautiful job, Deb. <3
Danelle Harvey says
Thanks so much. I’m drawn to little cubbies. 🤓
Pat says
Thanks so much for posting here for future reference. ❤
Danelle Harvey says
You’re welcome. I’m going to start trying to do that more. That way people can always find things. It’s one of my NY Goals.
CHRISTINE TURNER says
Looks awesome!!
Danelle Harvey says
Thank you!
Kelly Monfort says
You find the cutest things at antique stores! Love the paint technique!
Danelle Harvey says
Thanks so much. This was a little thrift store find. Even better.
Ann Woleben says
This is such a neat find. I love “thrifting” and finding a “treasure.” Thank you for sharing the DIY steps.
Jill says
Love love this technique you guys have definitely motivated me to get back to all the random furniture I have picked up here and there and do some WORK 😍
Danelle Harvey says
Yay…. Thank you! I love it when that happens. Other people motivate me a lot, too.
Cheryl Gibbs says
I absolutely love it! In fact, I love both the before and after. Deb did a great job and thank you both for posting. I was wondering if you have a quick minute, could you post the dimensions of the piece? If not, I understand. Happy New Year, you two creative ladies!
Danelle Harvey says
Thanks so much…. It’s only about 12″W x 12″T x 9″D It’s small. But would be perfect for organizing office items.
Michelle Hann says
I can’t wait to try this technique! I have never tried staining first. Thanks for sharing!
Danelle Harvey says
No problem. We stain first because it makes it look older.
Patti says
Thanks for sharing… love Deb’s technique. Love it!
Danelle Harvey says
Thank you, so much.
Stacey says
When you say do the piece in sections, did you mean the top , then sides? Or section top, section sides? Thank you for sharing! ❤️
Teresa says
You said you had white paint and used that. Any special info on the paint that can be used?
Danelle Harvey says
No… We just use any white paint that we have. It doesn’t have to be anything special.
Pam says
I love this technique and will be trying it. I also often use milk paint for that chippy look. I am just like you, I love white! Thank Deb for me
Danelle Harvey says
Hahahaha I just did.
Marie says
Oh my goodness!!! Love the process an May just have to take a swing… when I find a piece! Preferably a bed like y’all’s !!!
Rebecca Bleā says
I love this little cabinet. Thanks for showing the step by step directions. I’m going to try this as soon as I can find a similar piece. Love it sitting on the counter top! You made taking the guess work out of how to get this look and end result! Thanks mucho! 🌸