If you haven’t seen yesterday’s post, you may want to check it out. We have a rather lengthy list of things to do here in the entryway, and one of them being to install inexpensive flooring using #2 pine boards. Yes, you read that right… good old #2 pine boards as flooring with knot holes and all. Today’s post will even tell you how we accomplished that task.
OK, I have a story to tell.
DIY projects are our forte and we do have our motto, but there is a limit, remember? That being said, I paid a little visit to the wifey in our small backyard workshop while she was whittling something fancy, and showed her my tooth that I thought I chipped.
With a completely dead serious look on her face, she said, “I can smooth it out for you. I have a dremel tool.”
“Um…………………. no…… I’m good!” 😳
Remember what the entryway looked like after the trash was removed?
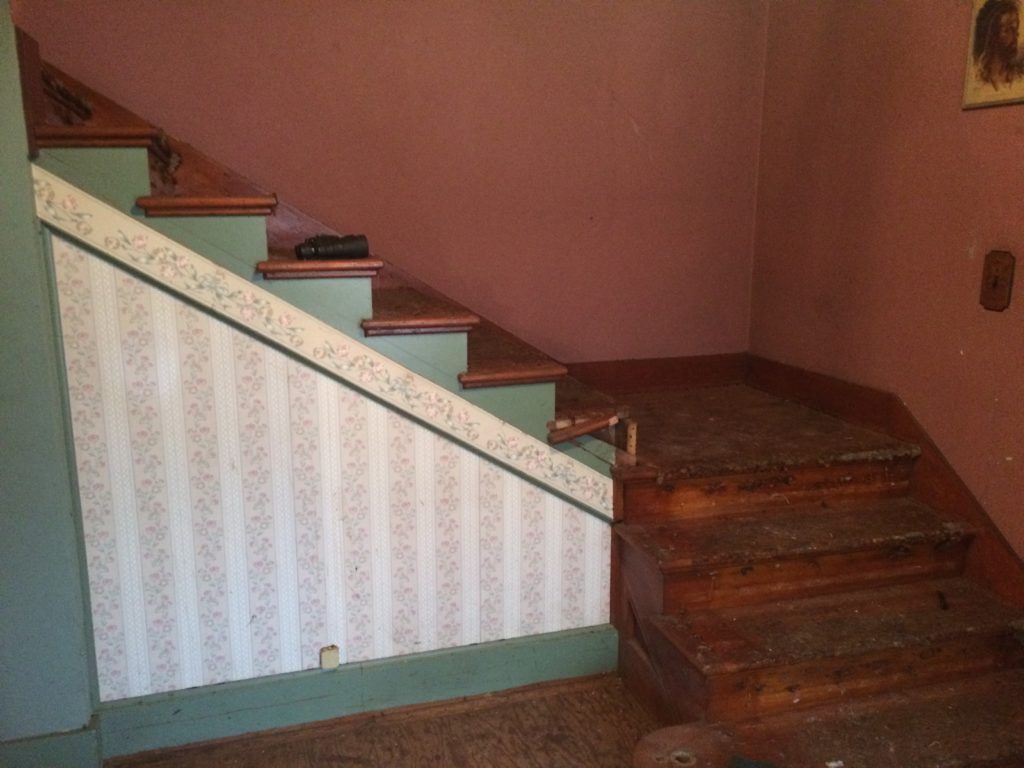
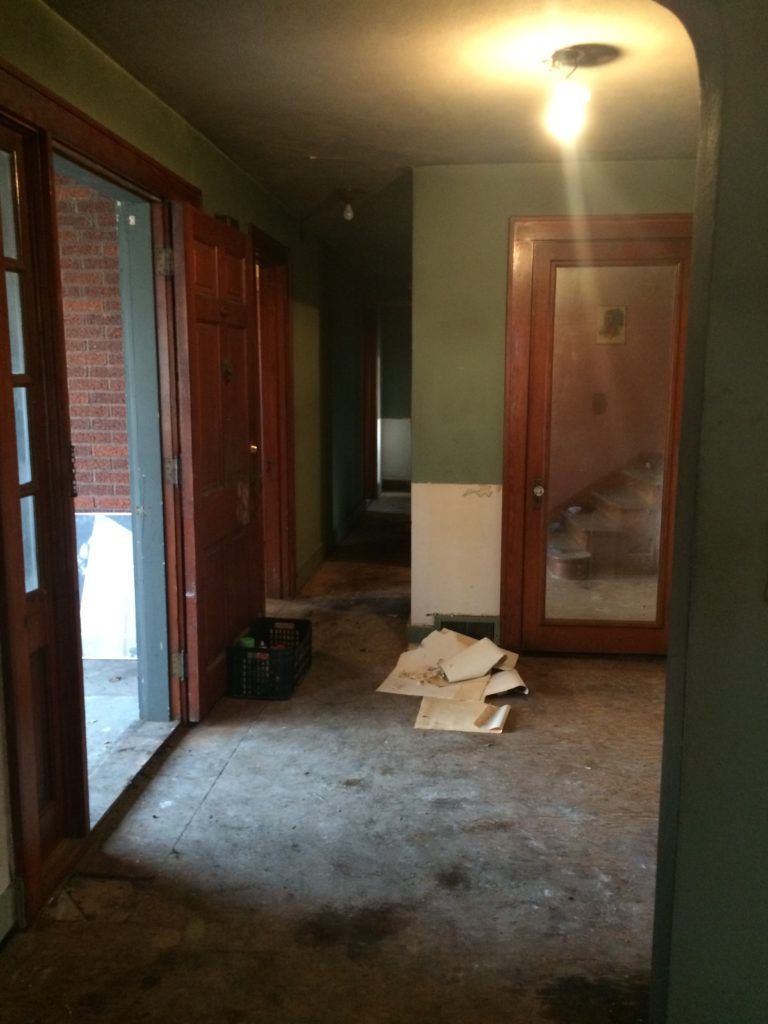
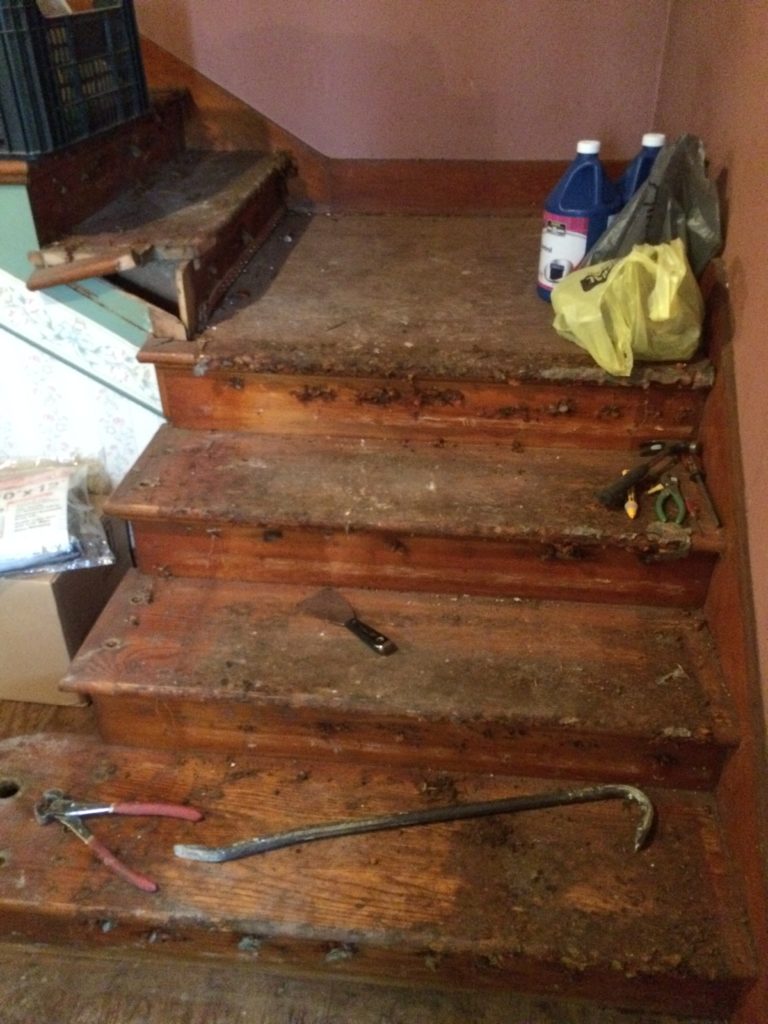

Bad Assery at it’s finest!
OK, I just had to! This pic makes me laugh.
Our Check List Included:
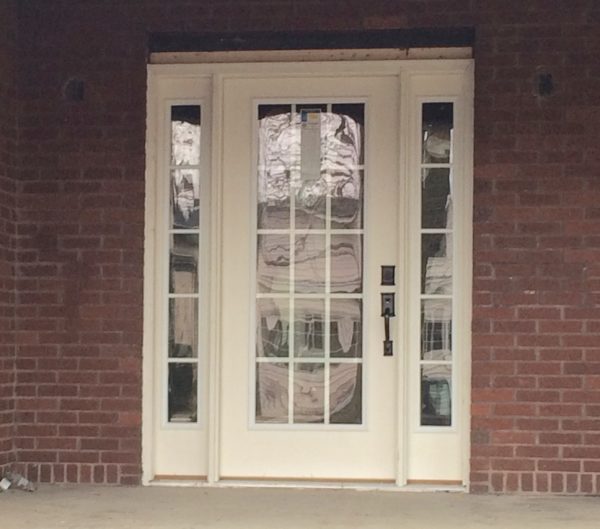
- Replace the exterior door with a full glass front door with full glass sidelights to let the “happy” mojo in. ☑️
- Close the guest closet with drywall and open it up to the other side of that wall for a kitchen pantry ☑️
- Change out the lighting to a fancy schmancy chandie – Gotta have one of those babies in every room – ☑️
- Paint all of the trim and walls my favorite shade of white – ☑️
- Repair, sand, and re-finish the steps on the stairway
- Repurpose a big chippy white porch column from floor to ceiling to give this entryway some pizzaz and gaudiness. Big and gaudy is our goal here.
- Install very inexpensive flooring using #2 pine boards.☑️
And here we are now:
(Excuse the cell phone pics)
*The new door is installed and lets in the good mojo which makes me pretty darn happy!
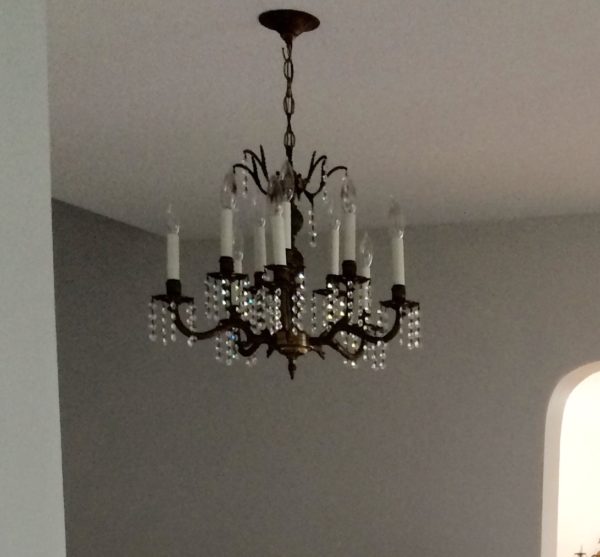
*An antique chandelier is installed and the walls are painted my favorite shade of white – Sherwin William’s Pearly White.
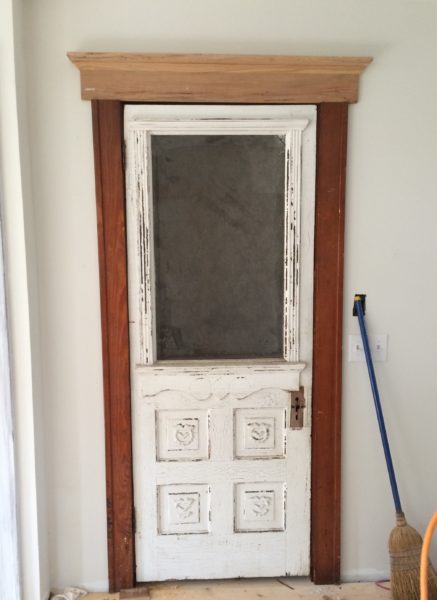
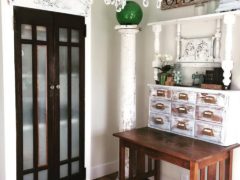
*The guest closet door is closed in the entryway and opened up to the kitchen on the other side of that wall to create a pantry. *****Just take a gander at this most awesome chippy pantry door, would ya?
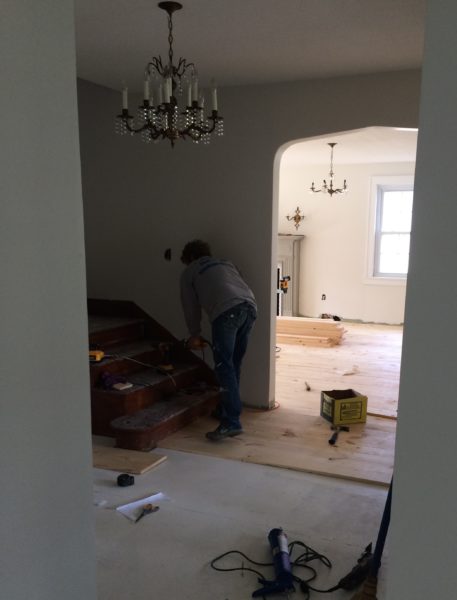
*And finally, Inexpensive flooring installation using #2 pine boards is complete.
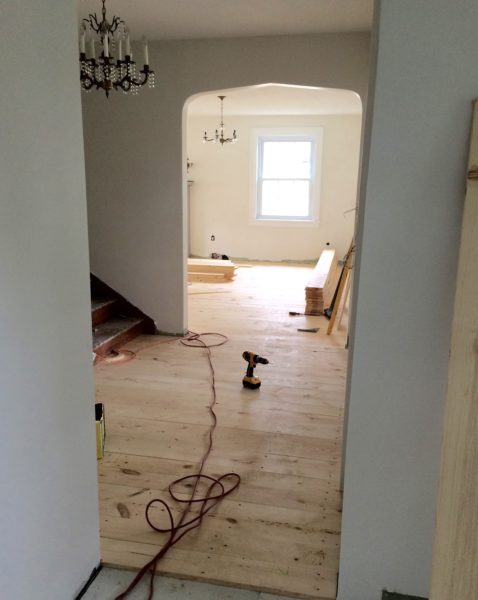
Why we went with #2 pine boards for an Inexpensive Flooring
First of all, inexpensive #2 pine boards truly are quite gorgeous when re-finished and you cannot beat the cost. We installed roughly 2500 sq feet of “flooring” that cost less than $4,000 with all supplies for installation.
And secondly, we really weren’t going for perfection as we wanted our floors to look rustic and original to our house that was built in 1945. The “#2” means the pine boards have knot holes and imperfections, thus, giving us that rustic look we were going for.
Now, I love my big box stores for lots of things, but #2 pine boards are not one of them. Our local lumber yard sold us some pretty nice quality pine boards, and, because we ordered such a large quantity, we got a better price.
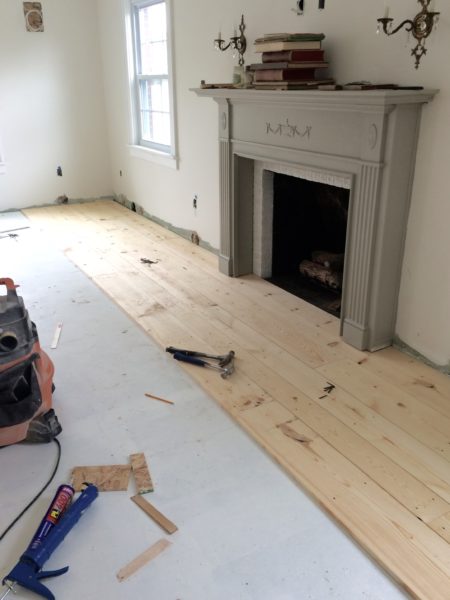
Installation of Wood Floors
Basically, we started on one side of the house, which happened to be the family room, which is to the right of the entryway, and randomly attached the different widths of boards (6″, 8″, 10″, & 12″), in different lengths, in no particular pattern, using an adhesive and nails.
A Few Extra Steps for Some Extra Goodness
We went a few steps further to make our floors look even more rustic. For extra torture, as if installing floors aren’t torturous enough, we installed the pine boards with square nails. I call it torture because we realized shortly after we started that it was a heck of a lot easier on our arms and backs if we pre-drilled a hole where we wanted a square nail. AND, once we were done with installation, we beat the heck out of the floor boards with different tools: chains, hammers, screw drivers, crowbars, etc. You get the picture. We realized the more we “damaged” the floor, the more rustic it looked.
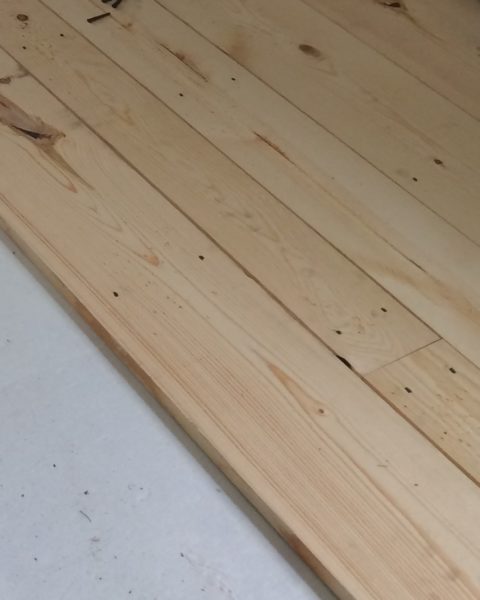
Finally….. The sawdust was swept, and then swept again, in order to prepare it for the stain and polyurethane process.
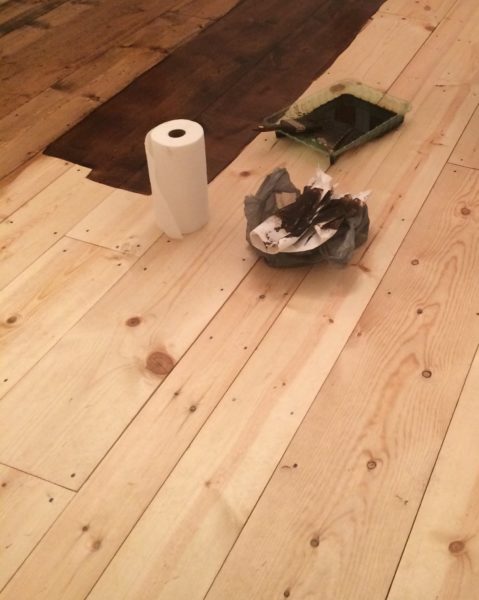
When all that is done, you have this….

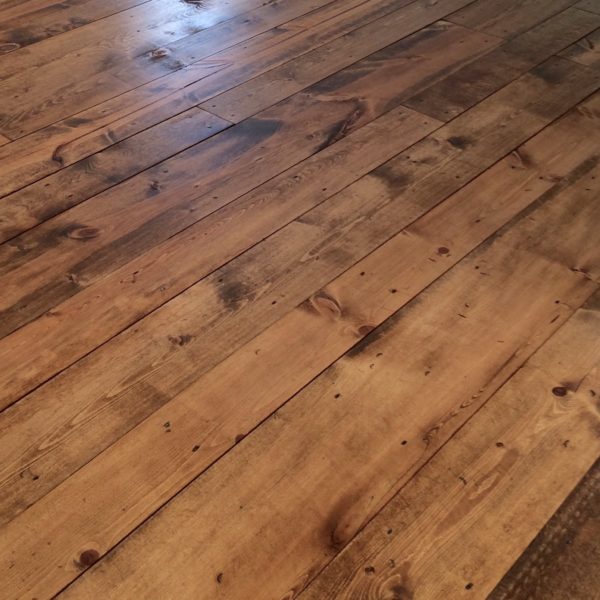
So, what do you think?
And…….BUH BYE NOW – Said in a loud, high-pitched old lady’s voice, because how else could you say BUH BYE NOW?
Danelle



Lori Lee says
The floors look awesome.. Can’t wait to see more pics.. I drive by that house after work going home sometimes..And I love what you have done to the outside of the house and the porch. Looks so inviting.
Danelle Harvey says
Thanks so much, Lori. It’s been a lot of work but very rewarding at the same time.
Linda Seidel says
Hey there dear friends! Gorgeous home, just like everything you do! What stain did you use?
Love you!
Danelle Harvey says
Thank you so much, Linda. We used Minwax “Provincial”.
Jp says
Did y’all just glue and nail into cement floor or a dud y’all put down a subfloor first?
Danelle Harvey says
This house sits on a full basement, so there was all wood sub-flooring (plywood) when we started.
Tina says
Wow Wow Wow!!!! I am so impressed. I just found your blog and I am so glad I did. I really want to try this now. Thank you so much for sharing. WoooooHoooo
Danelle Harvey says
Yay… I’m always excited to have a new follower. Let me know how it goes.
Tina says
WOW. I Loveeeeeeee the floors I have seen plywood used, and cut into strips but this is soooooo much better. And the nail and beating the hell out of it did the trick. A lot of extra work but the difference it made is amazing. Thank you so much for sharing. Love what your doing. Looking forward to what’s next👍😊
Danelle Harvey says
Thank you, Tina. And, thanks for following along with our journey!
Steph Benish says
I just found your website and I love what you are doing! Last year we bought an 1885 farmhouse on 66 acres. It had been vacant for 40 years, but retained so many cool details that I had to have it! It is grueling work when you are doing it yourself, so I can totally relate to your occasional break down. I started documenting our progress on YouTube and it is amazing to see how far we’ve come. Keep up the good work ladies!
Danelle Harvey says
Thank you so much. Good luck to you, too!
Bonita M Quinn says
I absolutely love your floor and the stain is so perfect…I want my floor to look exactly like yours! However, I took a pine board to Sherwin Williams and they tested with Minwax provencial stain…it looked much darker than in your pictures and there was no golden glow in portions of the floor boards as shown in your photo. My pine boards are scheduled to be put down tomorrow, a living room and porch of a cottage. Never in a million years would I have thought of using different width boards nor would I have known to use #2 pine. So thank you for that and for sharing all of your tips…I find it all very interesting and useful. -Bonnie
Danelle Harvey says
I just got this message. 😕 I sure hope you got everything figured out.
Bonita M Quinn says
I absolutely love your floor and the stain is so perfect…I want my floor to look exactly like yours! However, I took a pine board to Sherwin Williams and they tested with Minwax provencial stain…it looked much darker than in your pictures and there was no golden glow in portions of the floor boards as shown in your photo. My pine boards are scheduled to be put down tomorrow, a living room and porch of a cottage. Never in a million years would I have thought of using different width boards nor would I have known to use #2 pine. So thank you for that and for sharing all of your tips…I find it all very interesting and useful.
Stephanie says
I know this is an order post, but I hope I can still ask questions. Have you ever had issues with your wood shrinking or cupping and getting big gaps in it? I so want to do this, but the wood drying and the creating big gaps is a concern of mine. Thank you!
Danelle Harvey says
The wood does shrink… and the gaps get a little bigger as the wood dries. That’s why we say to guy new wood because they can be pushed tightly up against the next piece. As the wood dries, it can’t be bent at all. Did you see my other post I wrote with all of the common questions?
Candace says
So beautiful! I’m trying this in my house. Did you sand the boards before you stained them?
Danelle Harvey says
We did not. The only place we sanded was where we got any dirt on the boards or a few of them had a stamp from the lumber company.
Matt says
Hi, I love the floors and the finished product looks amazing. We are thinking of doing this in our old home as well and had a few questions on your install. 1) did you use tongue and groove boards? 2) what thickness are the boards? 3) did you nail into the joists or the subfloor or just wherever they landed?
Thanks,
Matt
Danelle Harvey says
We did not use tongue and groove. We just used regular pine boards from a lumber yard…so they are 1×6, 8, 10, and 12s all mixed together. And no, we just nailed them wherever we chose to. We used the big square nails. Did you see the other post I put together answering lots of questions? It’s here, if not: https://www.debanddanelle.com/inexpensive-wood-flooring-using-pine-boards-all-you-need-to-know/
Teri says
Hi. I absolutely love your floors. And I’m considering doing this in my house. I just have a couple of questions. First, did you use any type of underlayment between the sub floor and the boards? And did you use any type of pre-conditioner before applying the stain?
Jesse says
It looks nice but you are going to have a problem with expansion and contraction. Those old floors were usually done with ship lap. This allows you to keep dirt out from underneath your boards. I have seen a couple people do this before and dirt would work it’s way under the floor as it expands and contracts. The boards would slowly lift in spots leaving an uneven floor. I would have taken the extra step of setting a table saw or router table to make the boards into shiplap. The finished floor would have looked the same.
Danelle Harvey says
😂😂😂😂 We’ve had these floors for years in this house and even in our old house. The reason we said to use newer wet wood was so that you are able to push them as close together due to when they dry out. The crack will be smaller. We’ve never had them lift.
Emily says
Hi! I’m still trying to find the perfect stain but my pine has been installed and distressed. Did you use one coat of stain? How big of portion did you work with at a time before wiping off the excess stain? I’ve read that polyurethane can cause the wood to yellow with time and I want to avoid that. What type of poly did you use and have you found that it yellows?
Diana says
I have read both posts on these beautiful floors and am in the planning stage of using pine boards to “update” our 100 year old farmhouse floors. But…. I have a dumb question. As a DIYer, the ‘construction math’ is always challenging for me, lol. How did you calculate how much wood to purchase when using different width boards? Just asking this question brings me back to all the tears I used to shed when having to solve story problems in elementary school! And, I hate sounding like an idiot when I go to the lumberyards and figured I’d ask you before I venture into man-land. I love your style and follow your IG. You two are really awesome!
Danelle Harvey says
hahaha thank you. And lumberyard boy figured it out for us. LOL I told him how many square feet we needed.
Maite Alcaina Cambil says
Thank you very much!!! I always liked pine floors, but everybody was telling me the opposite, ” synthetic is the best”, “that’s an old one, but we have industrial developments which upgrade them” And bla bla. And a pine floor practitioner shows that pine flooring is not a crazy move, and I have photos about how it looks!
jonathan says
What stain did you use
Chanelle says
Hi, I absolutely love what you did with the floors! I’m curious what brand and colour stain did you use?
Melanie says
What brand and color of stain did you use?
Sara says
Curious on using pine wood floors in. Basement?
Ernest Gatchell says
What adhesive did you use on this project? If using a pneumatic nailer what size and gauge nails did you use. Why not shiplap the edges?
Geraldo de Araujo says
Are those boards tong and groove? The result was amazing.congrats